
LightWave Modeler LScript
Tested in: LightWave 11.03, 11.5 (probably works in v 9.6+ )
download WaveFormFitter v0.94 alpha for all platforms Win 32bit, 64bit, & Mac
build date: 19-Feb-2013 (if download does not show the latest version 0.94, please clear your browser cache and try again)
terms & conditions of download & use
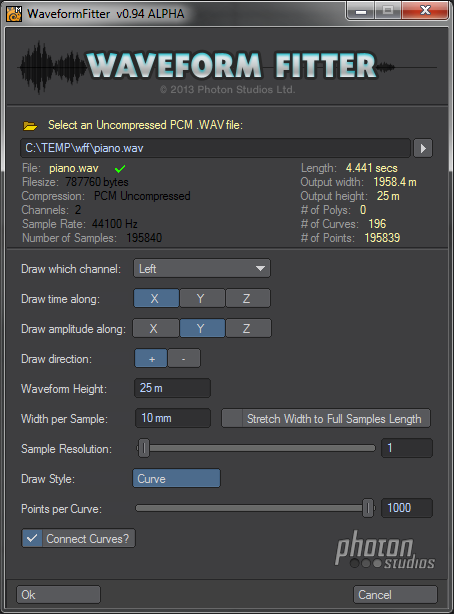
This little Modeler script draws audio Waveform curves in the current layer in Modeler, based on a loaded wav file you specify. You can draw the exact waveform of the audio for each sample, or you can draw a curve based on every N number of samples (the Sample Resolution). You can specify which channel of the waveform to draw, the Left, Right, or a combined Stereo version. You can specify the axis and direction to draw the waveform as well as the max Height extents of the resulting curve as well as the width between samples.
This script can be very useful for Motion Graphic artists using Lightwave and After Effects. You can export the curve this script makes as an .EPS and animate it in After Effects, or you could export the curve this creates to a Layout Motion Curve and animate objects or particles along it. There are many uses for the output waveform – but it’s up to you what you do with it. Tying audio work to Lightwave more closely can help animate speech and other syncable audio to your animations.
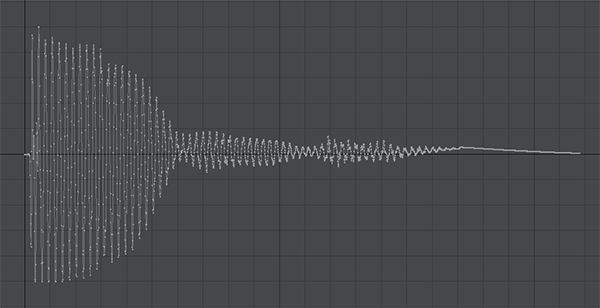
Here’s an example output waveform created by this script.
how to use it:
- Choose a blank layer (or one with geometry if you don’t mind this being added to that layer)
- Choose an Uncompressed WAV file to load (2 sample Wave files are included if you don’t have your own. There is 1 mono and 1 stereo file in the zip that you can test with.)
- Please Wait if it is a big file, there is a progress bar at the bottom which shows the loading.
- Select the Channel you’d like to Draw. You can draw either the left, right, or stereo (additively combined) channel of a wave file. For mono Wave files only Left is shown. Multiple track wave files are not supported.
- Choose the axes where you want to draw the waveform on. The drawing starts at the origin and the zero line is the same as the zero line phase of the waveform in the audio file. You will be prevented from selecting the same axis for time as amplitude, they must be different. The default is to draw time along the X-axis and wave amplitude on the Y-axis.
- You can specify a direction to draw the waveform forwards or backwards. Note: choosing + and setting a negative “Width per Sample” is the same as choosing – and a positive Width per Sample. Might as well just leave Width per Sample positive and use the + – buttons to choose draw direction.
- Waveform Height lets you choose the maximum height of the extents of the drawn waveform curve. For example, the setting of 10m means the curve’s highest and lowest points will be 10 meters apart.
- Width per Sample lets you specify the distance between sample points in the curve. This has the effect of determining the overall width of the output waveform curve. Information text below the listed Wave file will show you the calculated with as you change these values.
- Sample Resolution defaults to 1, which means that a point in the output waveform curve is drawn for every single sample in the selected channel of the audio file you’ve chosen. Chosing a higher number approximates the waveform by selecting every Nth sample point and only drawing those sample into the curve. The Info text above, shows the number of points that will end up in the curve as you adjust this value.
- Stretch Width to Full Samples Length checked, makes your output waveform curve the exact size of the waveform had you selected a Sample Resolution of 1. So this has no effect if Sample Res is 1. Otherwise it will stretch the waveform to the full width of the original waveform given your Width per Samples settings.
- At present this script only draws a Curve. Later versions will have many more options.
- Points per Curve, groups the drawn points in your samples to Lightwave Curve objects, the minimum this can be set to is 2 points per curve and the maximum is 1000 (Modeler has a maximum point # per curve, but this 1000 is an arbitrary number for now). This setting determines how many curves will be drawn to approximate your waveform.
- Checking Connect Curves merges points in this layer, reducing the number of points in the geometry created and essentially connecting all the curves in the waveform together. If this is unselected, then there will be duplicate points on top of each other and the curve objects created will be unconnected and movable. The Info text above shows the number of curves your setting will generate. BEWARE, if this is checked and existing geometry is on your layer it will merge their points too!
notes:
- Although this recognizes and identifies any Wav file, it only works with Uncompressed PCM Wav files – Sorry, but the time to write the decoding code for all the dozens of various wave file compression formats wasn’t worth it; if you need to use an mp3 or other formatted Wav file with this, then Audacity or any other audio app can be used to save an Uncompressed copy for use with WaveFormFitter.
- If you choose a Sample Resolution > 1 then the waveform will be an approximate shape of the actual waveform, and may not be the exact width of the full waveform (depending on whether your chosen Sample Resolution is a multiple of the total number of samples in the wav file). If you want the waveform to be the same length as the full waveform no matter how you approximate it with the Sample Resolution, then check the “Stretch Width to Full Samples Length” checkbox.
- This script remembers its basic settings between runs of it.
- BACKUP YOUR OBJECTS BEFORE USING THIS SCRIPT!! – This script is tested , HOWEVER, it is better to be safe than sorry in case an unlikely bug happens or you accidentally do something that you didn’t intend to.
- This script has been tested, but as it is ALPHA it is likely some Wave files will not work. The Wave file format is very free form and many apps do not adhere to the correct specs for the RIFF WAVE file format. This does however compensate for the junk XMP xml that Adobe Soundbooth sticks into every wave file it even opens – so those for sure still work.
- WaveFormFitter has been tested with some long length wave files, but it will likely error with very long ones. Subsequent versions will handle any (reasonable) length or give the ability to specify in and out points. In the meantime you can always export a snippet from your audio app to work with this script.
- This ZIP file contains:
– ps_WaveFormFitter_v0_94.lsc – the alpha Modeler Lscript you run
– ps_WaveFormFitter_v0_94.README – these text instructions and terms & conditions.
– sample mono and stereo uncompressed public domain wav files
changelog:
- v0.94 alpha – bug fixes:
– wave file info width & height now correctly updates; more WAV file format support,
– WAV files with “LIST” Chunks are now supported. Previous version failed if WAV “fmt ” chunk wasn’t the first chunk and “data” wasn’t the 2nd chunk in the file – now these chunks can be anywhere in the file as long as “fmt ” is before the “data” chunk. - v0.92 alpha – initial release
Waow!
That’s the tool I was searching for!
A simple way to anime with sound.
I would like to build effects like visualisations in windows media player
I try it and I come back…
Great. Glad it could help. It needs an update to add more features to it, but I’ve been working on another plugin instead. Let me know if you need something in particular with it and I’ll see what I can do. 🙂